- Home Page
- Screen Door Repair
How to fix your sliding door screen
Sliding door screen repair
Sliding door screen repair is not difficult. Like everything else it's just something that requires practice. Just remember - practice on your neighbours sliding door screen first !
Just Kidding !
I have put many years of my own experience into these online instructions, so you should be able to tackle just about any sliding screen repair problem.
And even if you still run into trouble, there is a great help resource at the bottom of this page where I give specific answers on plenty of screen repair problems.
Enjoy !
What kind of sliding door
screen do you have ?
First of all, you have to remove your sliding door screen.
But before you can do that, you need to know that there are four different types of screen door.
The picture links below take to the various screen door installation and removal pages that will help you remove just about any type of screen door.
The fourth type is the center run screen door which rides between the glass panels of a 4 panel patio door. These screen doors are very popular in Canada.
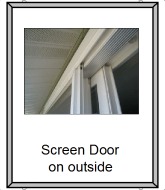
The screen door mounted on the outside is by far the most popular and easiest to repair. Usually these doors have rollers or glides mounted top and bottom.
The top hung doors are also mounted on the outside, but hang from rail similar to the way sliding barn doors work. Top hung doors are a bit more challenging because you are restricted to a certain manufacturers hardware.
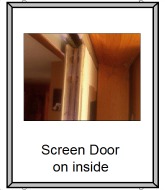
Finally there is the inside mounted sliding door screen. Pella is a company that made a sliding door screen like this with nice wood trim that is protected from the elements by having the screen door on the inside.
As well, I have a few pages devoted to questions that visitors have asked me about various manufacturers screen doors.
The tracks that the door
rides on are broken
Can you get new ones ?
Yes, the screen door track replacement page gives you what you need to know about replacing top, bottom and side tracks.
The screen door tracks comment pagealso has questions and answers about replacing all types of tracks used on screen doors and windows.
My Handle or latch is broken
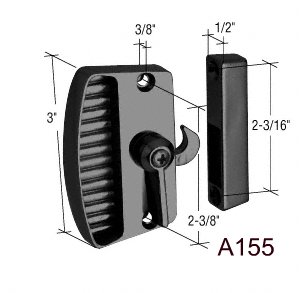
Broken screen door handles are pretty common. For the most part you can usually find new ones at the local bix box hardware stores like Lowes or Home Depot. You can often substitute a similar looking handle if they dont have the exact one your door uses. I have page on screen door handles so you can see what kinds are available. There is also a page about sliding screen locks and latches
Repairing a sliding door screen
Once you have the door removed, lay the sliding screen down on a flat surface with lots of room around you. Many Screen repair shops use a 4' x 8' table covered with carpeting to protect the screen doors painted finish.
I use a pegboard table because it allows me to attach clamps and tools to the table that are designed for use with pegboard.

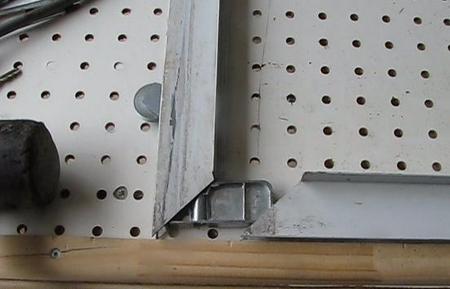
A couple of collapsible work tables will work just as well for any size sliding door screen. If you have no suitable tables, lay the screen door on the ground on top of sheets of cardboard to prevent getting the screen door frame scratched or marked.
Removing the old screen cloth
Before going too much further, make sure you have enough screen material
before you pull out the old screen cloth from the sliding screen door.
If you have not already got your screen cloth here are some links for
the various types available. Click here for fiberglass screening
Its the most commonly used screen material and the easiest to work with. Its biggest benefit is that if you roll it in too tight, you can often pull it out and start again.
Click this link for aluminum screen cloth, Aluminum is a bit more difficult to work with, you only have one chance to roll it in square and smooth. But if you have done a few aluminum screens you get used to it.
There is also petscreen pet proof screen cloth, Its a very strong polyester material that can stand up to pets scratching very well.
Its not that hard to install but you will need to get the spline size right.
You need at least 84 inches of cloth to repair the average sliding screen door with a height between 76 and 81 inches. That's the length you get in most pre-cut rolls from the hardware store.
Some screen doors are taller though so you may need to get the material cut off the 100 foot roll. The width of the cloth should be a few inches wider than your door. Common widths are 30, 36 and 48 inches.
Having trouble getting
the old spline out ?
Take a strong sharp pointed pin, (I use an awl), and poke around in each
corner of the spline channel to find the end of the spline. Then lever
the spline out of the channel, and grab it with your fingers then pull
it all the way out.
The video below shows a slider being repaired.
Notice how the clamps are used to hold the new cloth flat across
the whole frame. Keeping the material flat is half the battle.
Sometimes you wont be able to pull the spline out in one continuous length. It will keep breaking, especially if its white vinyl !. Exposure to the sun leaves plastic spline brittle and inflexible.
In those circumstances, you may have to use a utility knife to cut through the spline all around the spline channel until the spline disintegrates or comes free in small pieces.
An older slider may have aluminum or even steel spline. Aluminum spline can be pried out easily enough but it cannot be reused, so be sure you have the right diameter plastic spline on hand to replace it.
Steel spline can be reused but its probably easier to consider having new modern sliding door screen frames made to replace the old steel spline frames.
See this link for more information about screen spline, and all the shapes an sizes it is available in.
Getting the new material installed
You can now remove the cloth which should come out in one piece. Once you have removed the cloth, use a flat blade screwdriver to clean out the spline channel so that when you roll in new spline there will be no obstructions.
Slider frames have a tendency to cave in a little when the material is rolled in. Especially if the material is too tight. Window frames may need to have the sides bowed out by one quarter inch to compensate for the tension of the material.
Once in while you will find a slider that was already bowed or cambered in the factory. Part of the skill required in screening repair is to know how much tension to put on the cloth as you roll it in, so as not to bow in the frame.
To tell if the your slider has a "camber" to it. Hold the frame up to your face with the screen cloth removed and sight along one of the long rails. It should be obvious if you have rails that bow outward.
If you are using fiberglass cloth, you can usually pull out the spline and start over until you get it right. More practice is required to get aluminum cloth in properly as you cant pull it out and start over. You can clamp the door sides to a repair table to prevent them from being cambered in.
Some repair shops use a temporary metal bar across the center of the frame to stop the frame bowing in.
Heres a video of me doing a NoSeeUm screen door cloth install
Check your rollers before
installing the cloth !
The time before you roll the cloth in is also a good time to check the frame and the screen door rollers or glides. Check to see if they adjust up and down when the screws are tightened or released.
If they are are broken you might want to check out the patio screen door roller kits page for replacements.

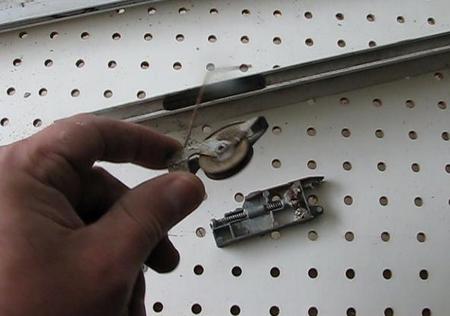
Many rollers, and most corners can only be serviced by disassembling the frame. So repair them now before spending any time re-screening or you will just end up repairing the frame again in a few weeks.
For help with your specific roller, it might be one that one of my visitors and I have discussed on the how to remove screen door rollers page. Check it out and see if you can get help there.
Also
check the frame to see if the rails fit tightly together and that there
no broken corners. If you find the frame is beyond repair you may want
to buy a new screen door kit and build your own slider.
Rolling in the new cloth
If the rollers are working well, lay the new cloth across the frame and use spring clamps to attach the cloth to the frame at each of its four corners.

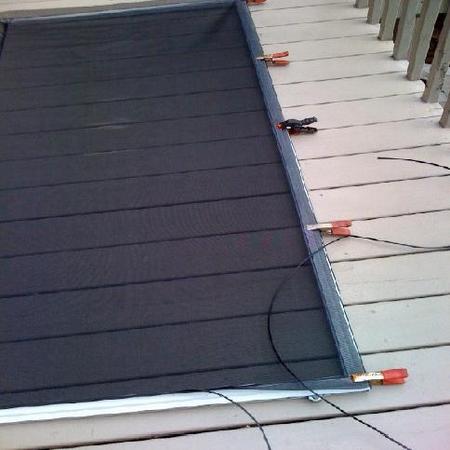
On one long side, attach a spring clamp at the center point of the slider frame. Release the clamp on the lower left corner and use a flat bladed screwdriver to push new spline into the spline channel on top of the new cloth.
Then switch to a spline roller, first rolling the new cloth into the spline channel and then rolling in the new spline. If the cloth is aluminum wire you will have to roll it in using gentle pressure to avoid tearing the cloth.
Keep the cloth slightly taught ahead of the roller with one hand while rolling with the other. Not too tight or the tension in the cloth will bend or bow the frame.
When you come to a corner you will need to remove the clamp at that corner just before rolling the material in. Then use the flat blade screwdriver to push in the cloth and spline in the area of the corner.
As soon as you have enough room, start using the roller again. Continue in this manner until you have rolled the cloth in all the way around.
Take a tape measure now and check to see if the frame width in the center is the same as on both ends. If it is narrower, and you have used fiberglass cloth, you can pull out the spline on the long side and re roll with less tension. If you have used aluminum, big problem, you will need to redo with a new piece of cloth.
If you are satisfied with the job, take a utility knife and cut away the excess material being extremely careful not to nick the good material !!!
Once the slider is reinstalled,
how do you adjust it ?
Maintenance, care and adjustment, How you go about setting up a slider so it opens smoothly and locks when it should.
As well, the screen door door installation and repair page has questions and answers about all types of different doors.
What if you need to cut
your slider to length ?
There are times when your slider just wont fit. Perhaps your patio door frame is sagging or you have found a slider thats "almost" the right size to fit your patio door.
Sliding screen door repair, cutting it shorter
Sometimes your door is just too darn tall. Here's how to shorten the door if it just wont fit.
Do you know who made
your slider?
I have a few pages devoted to questions that visitors have asked me about various manufacturers screen doors.
Guardian screen door repair will be helpful if you have a door made by Guardian, Andersen screen door repair is all about the doors made by V.E. Andersen Co. , Milgard screen door repair and Pella screen door repair talk about special things to consider with these companies doors.
Dont be too concerned if you cant find a manufacturers name on your door. Many companies including big ones like the above use common parts.
Many times window and door companies dont even make their own sliders. They have the parts and the doors made by someone else.
For example, Prime Line, in California, is a company who makes parts for many popular types of sliders.
Ideal Manufacturing makes hardware for dozens of other companies who make storm doors.
Is the slider lock broken ?
Slider latches get used constantly and eventually they wear out or fall apart.
The screen door locks and latches page has question and answers to help find a solution to your broken or missing lock problem.
Do you need a bugstrip ?
A bug strip is that long white or black vinyl strip that is mounted in the back edge of your slider to stop the bugs from getting in.
Some doors are so tight to the patio door frame that they dont really need one, but other screens have a large gap that need to be filled by the bugstrip.
Check the bugstrip for sliding screen doors page for more information
Do you have double doors ?
Some patio doors are very large and have 2 sliding panels that meet together in the center. The sliding screens have to meet together as well.
The piece of metal that helps join the two panels together is called an astragal.
It stops the light showing through when the panels are closed and it also hides the hasp that the lock needs to latch them together.
The joining screen doors together with an astragal page talks about problems and solutions with these types of doors.
Want your screen door to close behind you ?
We all like automatic sliding doors and I'm sure we will have screen doors that automatically open as we walk toward them at some point. Right now we have screen door closers that use a retractable line to pull the door closed behind you.
Making your entrances more secure
I am often asked about what to do to make a sliding door more secure from burglars. Check out the advice on the upgrading the security on your sliding door screen page.
Congratulations!
- You have just re-screened your first sliding door screen !
